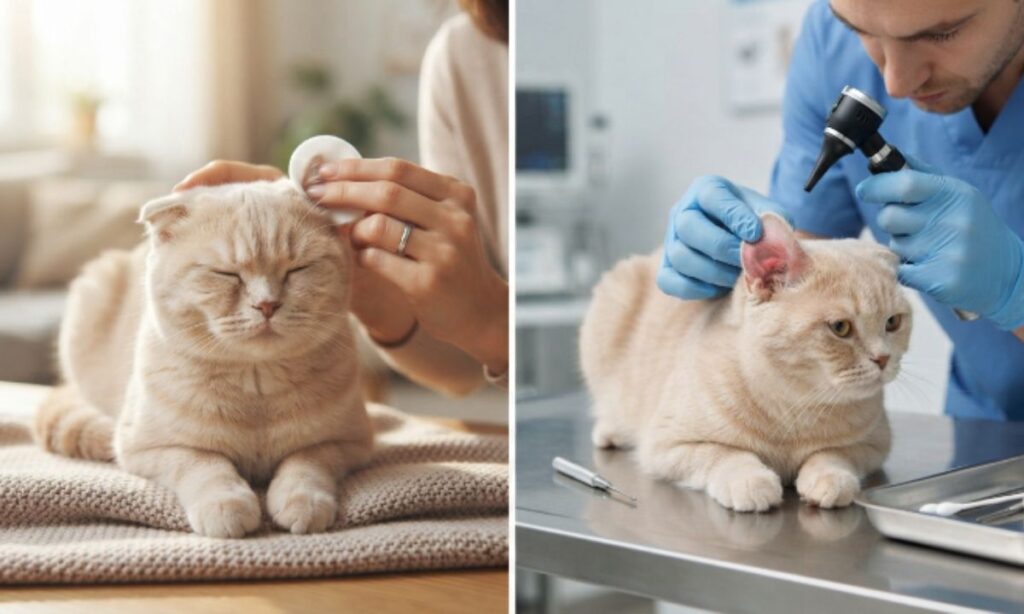
Your Scottish Fold’s ears are cute, but they require some special care. Those lovely folds hold in wax and moisture that straight-eared cats simply don’t have to worry about. Here’s how to clean them properly, so you can avoid a trip to the vet and a scratched-up arm.
The Scottish Fold’s ear is characterized by a deformation of the cartilage tissue, which creates a unique fold, directing the ear to the front and downwards, thereby changing the normal structure.
Due to this deformation, the surface of the ear is exposed to a lesser extent to airflow compared to a typical cat’s ear.
The reduced airflow may result in increased accumulation of earwax, dirt, and ear discharge, as these are not effectively removed or dried.
Furthermore, the accumulation of these substances can create favorable conditions for the growth of bacteria and fungi.
Therefore, this breed may have more frequent issues with ear infections and discomfort. The health and comfort of a Scottish Fold are directly dependent on the state of their ears. Hence, this breed requires more specialized and frequent ear care than other cats.
When You Should (and Should Not) Clean Scottish Fold Ears at Home
Normal Routine vs. Medical Situation
Not all cats require a regular cleaning of their ears. Many cats groom themselves sufficiently so that their ears do not need much attention.
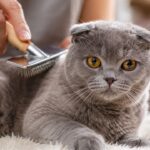
Scottish Folds, however, often benefit from a routine examination and cleaning of their ears as part of a normal grooming session rather than in response to a problem. It’s simply another way of caring for their unique needs, like trimming their nails or brushing their coats.
Warning Signs That Require a Vet
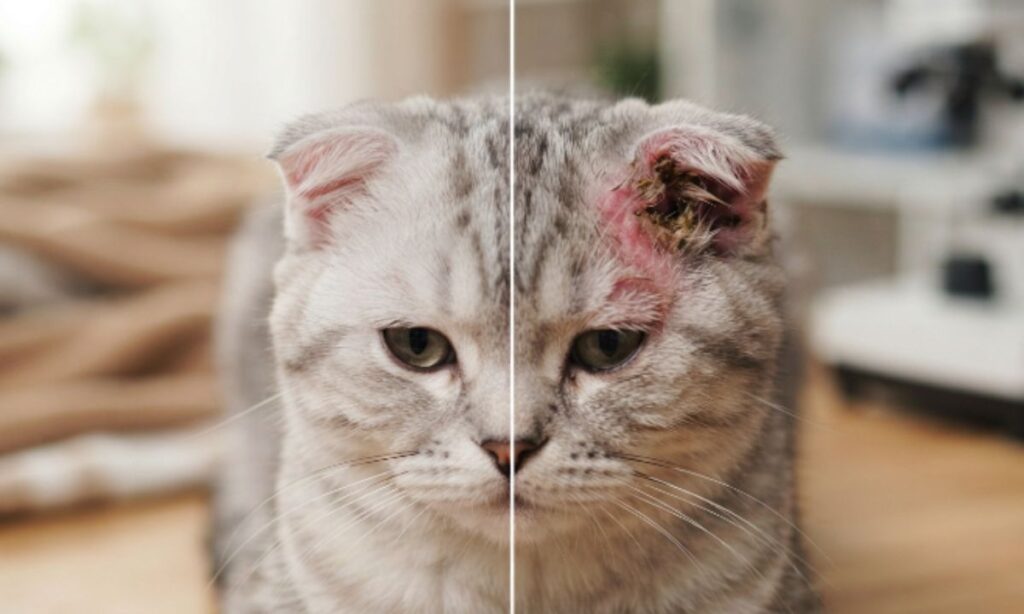
Home cleaning is for maintenance, not treatment. If you spot any of the following, stop and call your vet instead of reaching for the cleaning solution:
Redness or swelling inside the ear
A strong, unpleasant odor
Thick, dark, or unusual discharge
Constant scratching or pawing at the ear
Head tilting or visible pain when the ear is touched
These symptoms usually point to infection, mites, or another condition that needs diagnosis first. Cleaning an already-infected ear can make things worse and mask symptoms your vet needs to see.
Vet-Approved Supplies for Cleaning Scottish Fold Ears at Home
What You Should Use
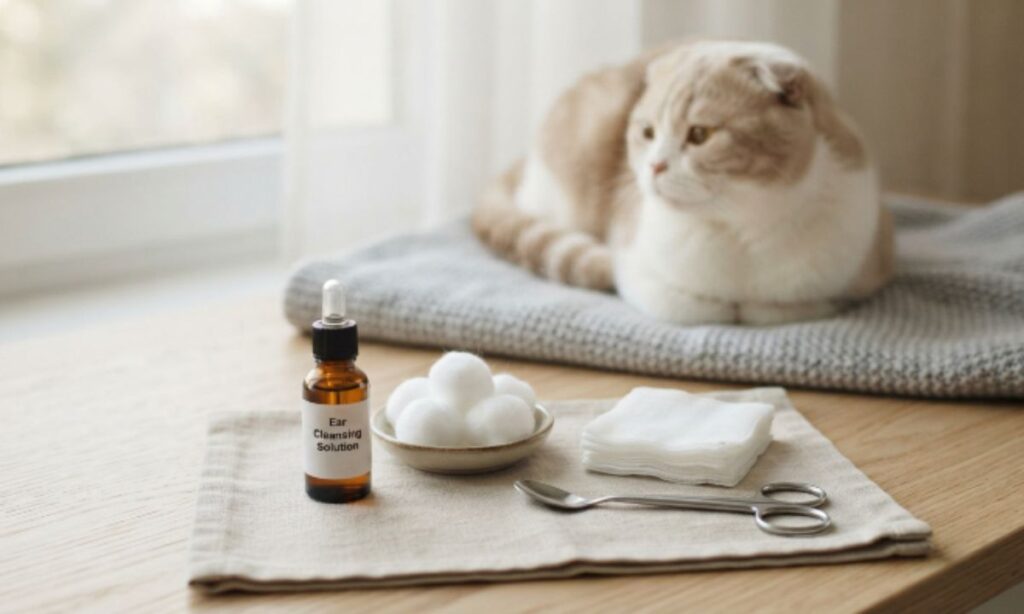
Keep your supply list simple. You don’t need anything fancy, just the right basics:
Cotton pads or cotton balls
Gauze squares
A cat-specific liquid ear cleaner (pH-neutral, fragrance-free)
A towel or blanket for gentle restraint
Having everything within arm’s reach before you start makes the whole process faster and less stressful for your cat.
What You Must Never Use
Some products cause more harm than good, even though they seem like reasonable substitutes. Avoid these completely:
Any harsh or scented cleaning product not made for animal ears
Cotton swabs are especially risky. They can push debris deeper into the canal or injure the eardrum if your cat moves suddenly.
Choosing the Right Ear Cleaner for Scottish Folds
Not all ear cleaners are created equal. Some are more drying/antibacterial to prevent recurrent infections, while others are more mild for maintenance only.
Ask your vet what type your cat requires prior to purchasing. What works for a cat without ear issues may not be advised for a cat with a history of infections.
Step-by-Step: How to Clean Scottish Fold Ears at Home
Step 1. Creating the Atmosphere of Trust
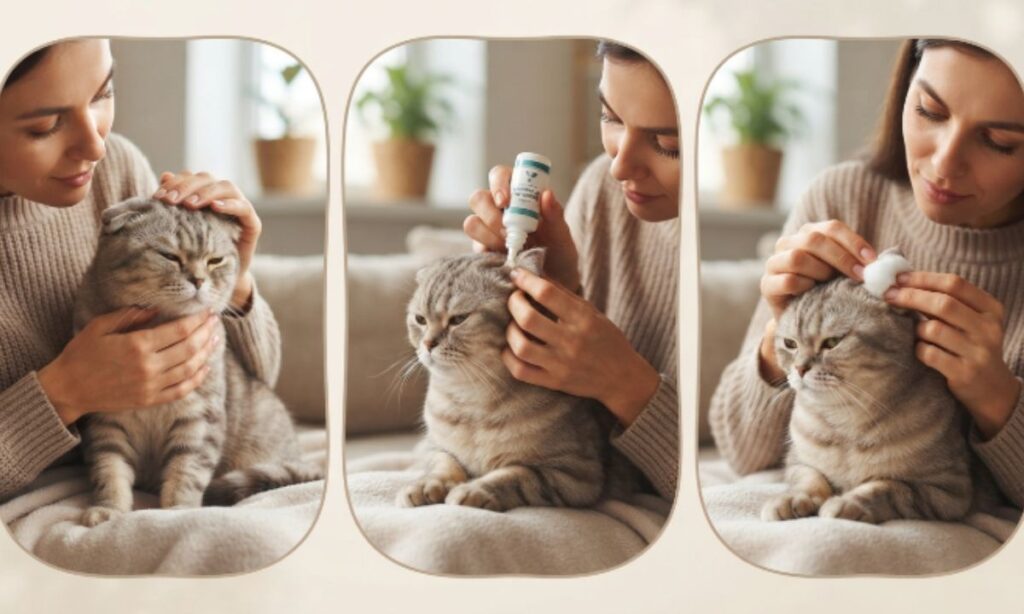
The first and foremost essential step in cleaning your Scottish Fold’s ears is to create the right atmosphere. In other words, make sure your cat is in the right mood for the procedure. It is better to start ear cleaning not after active play and exciting experiences but when the animal is relaxed.
Make sure to place the cat on your lap or another comfortable surface and, ideally, wrap them in a towel: having an opportunity to move freely can cause unpleasant surprises during the procedure.
Additionally, you should talk to your pet calmly and reassure them. It is also a good idea to have some treats ready: rewards are a great motivator and will help the cat remain calm.
Step 2. Getting Familiar with the Ear Condition
Before you proceed to actual cleaning, take a closer look at the cat’s ears. Ideally, you should be able to see the inside of the ear canal and examine it for foreign objects, discharge, redness, swelling, unpleasant odor, and other irregularities.
If you find any condition not mentioned above, skip the procedure and contact your vet: ear cleaning in such cases should be abandoned in favor of professional treatment. Ear cleaning should only be performed when no suspicious conditions are noticed.
Step 3. Applying the Ear Cleaning Solution
The next step is to apply the ear cleaning solution. To do that, you will need to lift the cat’s ear flap to expose the ear canal. Then, position the bottle with the liquid in your hand so that you can control the flow: it is better to avoid touching the ear canal with the tip of the bottle. Tilt the bottle to let the liquid flow out and make sure that the recommended dosage is reached.
Step 4. Massaging the Base of the Ear
Once you have introduced the liquid into the ear canal, you need to gently massage the base of the ear for 20-30 seconds. The purpose of this step is to allow the liquid to penetrate deeper into the folds and loosen any dirt or wax.
During the massage, you are likely to hear a squishing sound: this is completely normal and indicates that the liquid is doing its job.
Step 5. Encouraging the Cat to Shake Its Head
After you finish massaging, encourage the cat to shake its head: this will help remove the loosened debris. You may notice liquid getting ejected from the ear alongside the dirt. If that happens, you may want to have a towel at hand to blot some of the liquid.
Step 6. Removing the Discharge with Cotton Pads
The next step is to remove the visible discharge and liquid with cotton pads. Make sure the surface of the ear and its folds are clean.
Avoid using cotton swabs or other thin objects to remove any dirt from the ear canal: only its outer part should be wiped. This step is vital in preventing infections and other complications.
Step 7. Ear Cleaning Aftercare and Rewarding the Cat
The last step in ear cleaning is to remove the liquid from the second ear, following the same instructions as for the first one. After both ears are cleaned, it is time to reward the cat: this can be either a treat or a longer duration of playtime.
Such a reward is a great motivator for the future: regular ear-cleaning procedures will no longer be a scary experience but a routine part of life for your Scottish Fold.
How Often to Clean Scottish Fold Ears at Home
There is no universal answer for all cats. Some Scottish Folds may only require occasional inspection, while those with unhealthy build-up may need more regular and thorough cleanings.
In general, a weekly cleaning can be ideal for most Scottish Folds, but it may not always be necessary. It is best to clean your cat’s ears every other week or as advised by your veterinarian for any condition that may require treatment.
It is always a good idea to ask your vet to create a personalized long-term plan for cleaning rather than trying to determine a timeline yourself.
Scottish Fold Ear Hygiene and Common Problems
Ear Infections, Mites, and Allergies
Several conditions commonly affect cat ears, and Scottish Folds aren’t immune to any of them:
Infections from bacteria or yeast, often linked to trapped moisture
Ear mites, which cause intense itching and dark, crumbly discharge
Allergies, which can lead to inflammation and excess wax production
Regular cleaning won’t cure these conditions on its own, but it does remove debris that gets in the way of treatment. Clean ears let medicated drops reach the affected tissue more effectively.
How Folded Ears Affect Health
The fold itself is the root of the problem. Trapped moisture and wax sit in a warm, low-airflow environment, which is exactly what bacteria and yeast need to multiply.
Without regular monitoring, this can turn into a cycle of repeat infections that are harder to treat each time. Staying consistent with checks is the best way to break that cycle before it starts.
Integrating Ear Cleaning into Scottish Fold Grooming Routines
Weekly Ear Checks with Brushing and Nail Trimming
You can do this by pairing it in with other grooming activities that your cat already allows you to do, such as brushing their fur or trimming their nails.
This way, they only have to sit through one stressful grooming session rather than many.
Turning Ear Cleaning into a Positive Bonding Ritual
Patience is a virtue here, so try working on slowly introducing ear cleaning in your cat’s daily routine using a soft voice. Make sure to end each session on a positive note by giving your cat something he loves. Most cats will eventually come around to accepting the ear cleaning after seeing that it results in rewards. The ear cleaning will eventually become a regular part of your cat’s life.
Frequently Asked Questions
Is it safe to clean Scottish Fold ears at home?
Yes, as long as you use cat-safe products, avoid inserting anything into the canal, and stop if you notice signs of infection.
Do all Scottish Folds need regular ear cleaning?
Most do, since their folded ear shape traps more wax and moisture than a straight-eared cat’s ears, but exact frequency should come from your vet.
What happens if I accidentally use the wrong product?
Rinse the ear with a vet-approved solution if possible and call your vet right away, since products like alcohol or vinegar can irritate or damage the ear canal.
Can I use cotton buds inside my cat’s ears?
No, cotton swabs can push debris deeper into the canal or injure the eardrum, so stick to cotton pads or gauze on the outer ear only.
When should I stop cleaning and go to the vet?
Stop immediately if you notice redness, odor, thick discharge, excessive scratching, or signs of pain, and schedule a vet visit instead.
Final Thoughts
Cleaning the ears at home of a Scottish Fold is usually not difficult for both the animal and the owner. Moreover, this procedure helps to prevent many diseases by regularly checking the ears’ condition. Nevertheless, a pet owner should not try to cure any condition at home; if something seems wrong, it is better to consult a vet.
To prepare for cleaning, it is essential to purchase special tools and learn all the rules and regulations concerning the Scottish Fold breed. Additionally, an owner should be ready to make this process part of their pet’s daily life to ensure a good attitude toward cleaning. It is also vital to note that cleaning should not be done at home when the ears are injured or unhealthy; in this case, owners should contact their local vet.
I’m a passionate pet writer who loves sharing practical tips, trusted advice, and heartwarming stories about cats, dogs, and other beloved companions. Through PetCaffine.com, I help pet lovers better understand their furry friends with easy-to-read articles on pet care, nutrition, behavior, health, and everyday life.